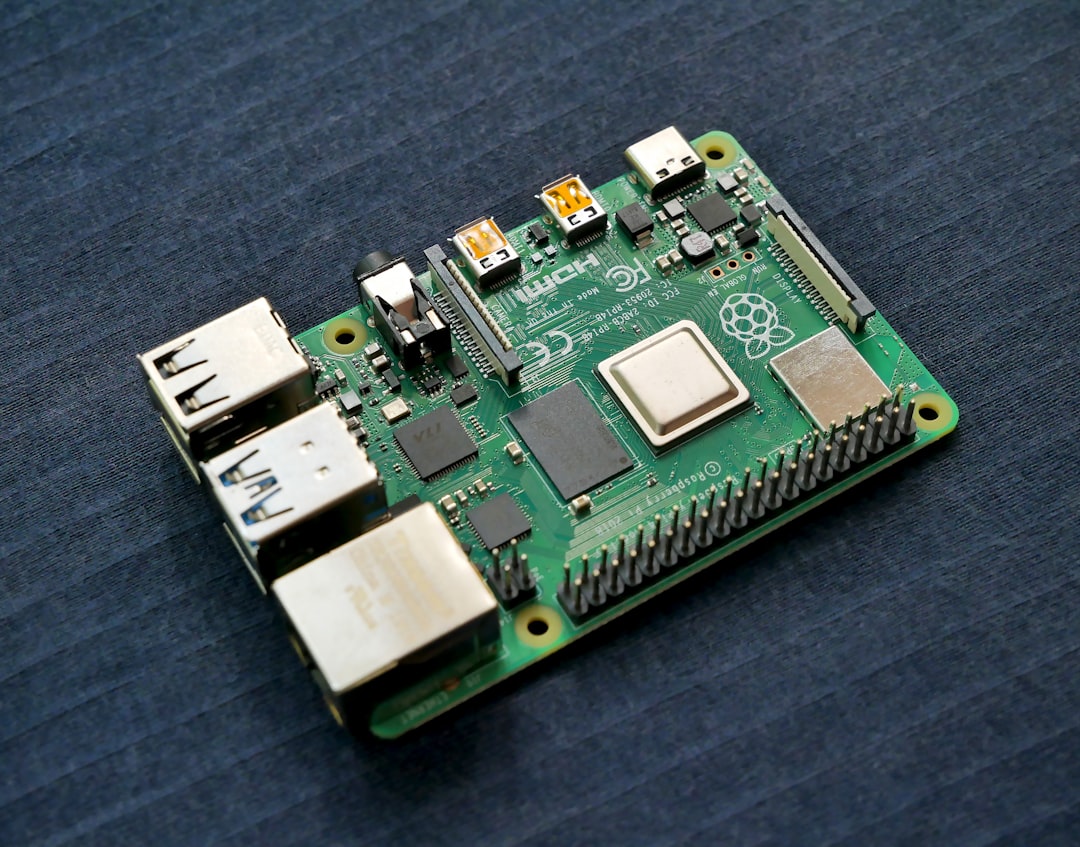
What You'll End Up With
This guide walks you through a complete Raspberry Pi server setup: flashing Ubuntu Server 24.04 LTS to an SD card, booting headless, hardening SSH, configuring a firewall, and enabling automatic security updates. At the end you'll have a production-ready server you can SSH into from anywhere and deploy apps on — for roughly $0/month in hosting fees beyond the hardware you already own.
Prerequisites:
- Raspberry Pi 4 or 5 (2 GB RAM minimum; 4 GB recommended)
- MicroSD card, 32 GB or larger (Class 10 / A2 rated)
- A second machine (Linux, macOS, or Windows) to flash the card
- Ethernet cable and a router with DHCP
- Raspberry Pi Imager 1.8+ installed on your flashing machine (raspberrypi.com/software)
- Basic comfort at a terminal
Step 1 — Flash Ubuntu Server 24.04 LTS to the SD Card
Open Raspberry Pi Imager. Select Raspberry Pi 5 (or your model) as the device, choose Other general-purpose OS → Ubuntu → Ubuntu Server 24.04 LTS (64-bit) as the OS, and select your SD card as storage.
Before writing, click the gear icon (or press Ctrl+Shift+X) to open the advanced options panel. Configure the following:
- Hostname:
pi-server - Enable SSH: checked; select Allow public-key authentication only
- SSH authorized keys: paste your workstation's public key (run
cat ~/.ssh/id_ed25519.pubon your workstation to get it) - Username:
deploy(avoid the defaultubuntuorpi) - Password: set a strong one as a fallback
- Locale / timezone: match your region
Click Save, then Write. Imager will flash and verify the image automatically.
Step 2 — Boot the Pi and Find Its IP Address
Insert the flashed card into the Pi, connect the Ethernet cable, then apply power. Wait 60–90 seconds for first-boot cloud-init to finish.
1. Scan your local network to find the Pi's IP address:
nmap -sn 192.168.1.0/24 | grep -A2 'Raspberry\|pi-server'
Expected output (IP will differ):
Nmap scan report for pi-server (192.168.1.42)
Host is up (0.0012s latency).
MAC Address: DC:A6:32:XX:XX:XX (Raspberry Pi Trading)
Alternatively, check your router's DHCP lease table. Note the IP — 192.168.1.42 is used as the example throughout this guide.
Step 3 — Connect via SSH and Update the System
1. SSH in as the user you configured in Imager:
ssh deploy@192.168.1.42
Accept the host fingerprint on first connection.
2. Update all packages:
sudo apt update && sudo apt full-upgrade -y
Expected output ends with:
0 upgraded, 0 newly installed, 0 to remove and 0 not upgraded.
(or a list of upgraded packages — that's fine).
3. Reboot to apply any kernel updates:
sudo reboot
Wait 30 seconds, then SSH back in.
Step 4 — Harden SSH
Editing /etc/ssh/sshd_config directly risks breaking the file. Ubuntu 24.04 supports drop-in config files under /etc/ssh/sshd_config.d/ — use that instead.
1. Create a hardening drop-in:
sudo nano /etc/ssh/sshd_config.d/99-hardening.conf
2. Paste the following content:
Port 2222
PermitRootLogin no
PasswordAuthentication no
PubkeyAuthentication yes
X11Forwarding no
MaxAuthTries 3
LoginGraceTime 20
AllowUsers deploy
Save with Ctrl+O, exit with Ctrl+X.
3. Validate the config before restarting:
sudo sshd -t
No output means no errors.
4. Restart SSH:
sudo systemctl restart ssh.service
5. Open a second terminal and verify the new port works before closing your current session:
ssh -p 2222 deploy@192.168.1.42
Once confirmed, you can close the original session.
Step 5 — Configure the Firewall with UFW
Ubuntu 24.04 includes UFW. Enable it and allow only the ports you need.
1. Allow your new SSH port:
sudo ufw allow 2222/tcp comment 'SSH'
2. Allow HTTP and HTTPS if you plan to run a web server:
sudo ufw allow 80/tcp comment 'HTTP'
sudo ufw allow 443/tcp comment 'HTTPS'
3. Enable UFW:
sudo ufw enable
Type y when prompted. UFW starts on boot automatically.
4. Verify the rules:
sudo ufw status verbose
Expected output:
Status: active
Logging: on (low)
Default: deny (incoming), allow (outgoing), disabled (routed)

To                         Action      From
--                         ------      ----
2222/tcp                   ALLOW IN    Anywhere
80/tcp                     ALLOW IN    Anywhere
443/tcp                    ALLOW IN    Anywhere
Step 6 — Enable Automatic Security Updates
Manually patching a home server is easy to forget. unattended-upgrades applies security patches automatically.
1. Install the package:
sudo apt install unattended-upgrades -y
2. Enable and configure it:
sudo dpkg-reconfigure -plow unattended-upgrades
Select Yes at the prompt.
3. Edit the configuration to enable automatic reboots during off-hours:
sudo nano /etc/apt/apt.conf.d/50unattended-upgrades
Find and uncomment (or add) these lines:
Unattended-Upgrade::Automatic-Reboot "true";
Unattended-Upgrade::Automatic-Reboot-Time "03:00";
Save and exit.
4. Verify the service is active:
sudo systemctl is-enabled unattended-upgrades.service
Expected output:
enabled
Step 7 — Assign a Static Local IP (Optional but Recommended)
A changing DHCP lease breaks any port-forwarding rules you set on your router. Assign a static IP via Netplan — Ubuntu 24.04's network manager.
1. Find your interface name:
ip link show
Look for something like eth0 or enxb827eb.... Use that name below.
2. Create a Netplan config:
sudo nano /etc/netplan/99-static.yaml
3. Paste the following, replacing values for your network:
network:
  version: 2
  ethernets:
    eth0:
      dhcp4: false
      addresses:
        - 192.168.1.42/24
      routes:
        - to: default
          via: 192.168.1.1
      nameservers:
        addresses:
          - 1.1.1.1
          - 8.8.8.8
4. Apply the config:
sudo netplan apply
Your SSH session may drop. Reconnect to 192.168.1.42 on port 2222.
Verify It Works
Run these checks after completing all steps to confirm your Raspberry Pi server setup is solid.
1. Confirm SSH is listening on port 2222:
sudo ss -tlnp | grep 2222
Expected output:
TEXTLINE: LISTEN 0 128 0.0.0.0:2222 0.0.0.0:* users:(("sshd",pid=...,fd=...))
2. Confirm UFW is active:
sudo ufw status
3. Confirm automatic updates are configured:
sudo unattended-upgrade --dry-run --debug 2>&1 | head -20
Look for Packages that will be upgraded: or No packages found that can be upgraded — either is correct.
4. Confirm the static IP is applied:
ip addr show eth0
The address block should show 192.168.1.42/24.
Troubleshooting
SSH connection refused on port 2222
Verify the drop-in file has no syntax errors (sudo sshd -t) and that the service restarted (sudo systemctl status ssh.service). Also confirm UFW allows port 2222 (sudo ufw status).
Locked out after changing SSH port
If you have a monitor and keyboard, connect them. Log in locally, run sudo ufw allow 2222/tcp and sudo systemctl restart ssh.service, then retry from your workstation.
Pi not found on the network after flashing
Cloud-init can take up to 2 minutes on first boot. Wait longer, then re-scan with nmap. If still missing, reflash — the most common cause is a corrupted write.
Netplan apply drops the connection permanently
If the static IP is wrong, the Pi is unreachable over the network. Connect a keyboard and monitor, log in locally, and edit /etc/netplan/99-static.yaml to correct the address or gateway.
unattended-upgrades service not found
Run sudo apt install unattended-upgrades -y again and check sudo systemctl status unattended-upgrades.service for error output.
Password authentication still works after hardening
Confirm PasswordAuthentication no is in /etc/ssh/sshd_config.d/99-hardening.conf and that no other file in /etc/ssh/sshd_config.d/ overrides it. Run sudo grep -r PasswordAuthentication /etc/ssh/ to check.
Next Steps
Your Raspberry Pi server setup is now production-ready for a home lab or low-traffic self-hosted apps. From here:
- Install Docker:
sudo apt install docker.io -y && sudo usermod -aG docker deploy— then log out and back in. - Add a reverse proxy: Install Caddy or Nginx to serve multiple apps on ports 80/443 with automatic TLS.
- Expose to the internet: Set up a Dynamic DNS service (e.g., DuckDNS) and forward port 443 on your router to
192.168.1.42. - Monitor resources: Install
htopandncduto keep an eye on CPU, RAM, and disk on the SD card. - Backup the SD card: Periodically image the card with
sudo dd if=/dev/mmcblk0 bs=4M | gzip > pi-backup.img.gzfrom a machine with the card inserted.
A Raspberry Pi 5 with a quality SD card handles several simultaneous Docker containers without breaking a sweat — enough to run a personal site, a Git server, a password manager, and a home automation stack concurrently.